
Showing posts with label recipe. Show all posts

Saturday, February 5, 2011

Tropical Traditions Organic Thicked Rolled Oats Review & Giveaway with Banana Walnut Overnight Oats Recipe

~~~THIS GIVEAWAY HAS ENDED~~~

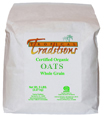
We love oats in our home and go through about 5 lbs in a month, easy. I love using oats for making chewy granola bars, crunchy granola bars and oatmeal mostly. For the past year I have been buying the organic thick rolled oats from the healthfood store out of the bulk section and keep them in one of my Snapware containers. I have to keep them hidden because if Ethan sees it he has a fit until I give him some to eat. Yes, he eats them raw. Oats are the only thing that I found would boost my milk supply when I was nursing Ethan. If you are a nursing mommy, or soon to be, keep oats in mind. If I didn't have oats one day I noticed a drastic difference in my supply by the late evening. Oats are good for everyone too because they are a whole grain. It's so important to eat organic whole grains because conventionally grown whole grains are sprayed heavily with pesticides.


I was excited to review another Tropical Traditions product and especially because I would be reviewing their organic thick rolled oats. I made oatmeal a few times with the oats and loved them. Actually, that may be an understatement! I have never had oats this thick before. They do take more liquid and more time to cook them when you are making oatmeal, but they are still very creamy and delicious.


Tropical Traditions has many recipes for their organic thick rolled oats if you want new and creative ways to incorporate oats into your diet. I have been reading about Overnight Oats for several months now and have been curious to try them out myself. I put together a simple recipe to share with this review, Banana Walnut Overnight Oats. This recipe knocked my socks off! Don't let "cold oatmeal" scare you, it actually tastes much better than hot oatmeal and it is very soft. All the flavors blend together wonderfully and this tastes more like a dessert than breakfast. I can't wait to come up with other Overnight Oat recipes, I'm totally hooked! I assure you that you'll be seeing overnight oats on my menu plan for a while to come.

Banana Walnut Overnight Oats
Serves 1 (large portion!)

1/3 cup of Tropical Traditions Organic Thick Rolled Oats
2/3 cup unsweetened organic coconut milk
1/4 tsp Vietnamese cinnamon
1 tsp raw honey (or more to taste)
1 large TBS organic walnuts
1 banana, sliced

Mix oats and milk in bowl. Cover and refrigerate overnight (Mine was in the fridge for 12 hours).


Take out of the fridge and set aside while you gather your other ingredients.


Mix all ingredients into your oats and then enjoy!

Feel free to use more or less milk when you make your overnight oats. You can also use any type of milk you wish.


BUY IT! You can buy directly from Tropical Traditions.


WIN IT! Tropical Traditions is giving away a 5 lb bag of their Organic Thick Rolled Oats to Take Time to Smell the Rose reader! 

Tropical Traditions also has a Referral Program, so if you place an order with them as a first-time customer, please select “Referred by a friend” and in the box that says “How did you hear of us?” enter my sponsor ID number 6059810. By telling Tropical Traditions that I referred you, you will receive a complimentary copy of the book Virgin Coconut Oil: How it has changed people’s lives and how it can change yours! by Brian and Marianita Shilhavy with your first order! This book is filled with testimonies and research showing how healthy coconut oil is, and it also includes over 85 recipes showing how one can incorporate coconut into their diet.


You have the chance to enter several entries by the doing the following. Each one counts as 1 entry unless otherwise specified. I am now making it a requirement to follow my blog publicly on Google Friend Connect to enter my giveaways.
  • MANDATORY ENTRY(You also must be following my blog publicly on Google Friend Connect)-counts as 1: AND Look around at Tropical Traditions to see what they offer. Tell me an oat recipe from their website that you would love to try.
    • Subscribe to my blog via email with Feedburner (on right side bar).
    • Blog about my giveaway linking back to this giveaway and Tropical Traditions. Leave the URL where you blogged. 6 entries!
        • Grab my  Take Time to Smell the Rose button. Leave URL where it is posted.
        • Grab my Take Time to Share Your Giveaway Sunday button. Leave URL where it is posted.
        • Grab my Bump 2 Baby event button. Leave URL where it is posted. 
          • Follow Smell_the_Rose AND Tropical Traditions  on Twitter AND tweet about this giveaway. After initial "tweet" you may gain an extra entry each day. Limit 1 tweet a day.  Leave URL where you tweeted in your comment. 

                                    Please copy and paste this for your tweets: 


                                    Win a 5lb bag of #Organic Thick Rolled Oats from @TropTraditions & @Smell_the_Rose #giveaway http://tiny.cc/TropTradOats

                                    **Leave your email on each comment. You must do this in order to win!**

                                    Giveaway ends Wednesday, February 16, 2011 at 9:00 p.m.(CST) Winner will be drawn by the random number generator at Random.org and will be notified by email. Winner will also be announced on this blog. Winner will have 48 hours to respond or a new winner will be drawn.

                                    This giveaway is open to USA & Canadian residents ONLY . Must be 18 years old or older to win.

                                    Disclaimer: Tropical Traditions provided me with a free sample of this product to review, and I was under no obligation to review it if I so chose.  Nor was I under any obligation to write a positive review or sponsor a product giveaway in return for the free product. The thoughts and opinions expressed on my blog are my own and are not swayed by any monetary or product compensation. My personal health experiences may not be a typical result for others.
                                     
                                    Photobucket


                                    MyFreeCopyright.com Registered & Protected
                                    ~~~THIS GIVEAWAY HAS ENDED~~~

                                    Tuesday, January 18, 2011

                                    Whole Wheat PopTarts Recipe

                                    I've been craving something a little different this week for breakfast or a snack. I came across the Homemade Healthy Poptarts recipe on Heavenly Homemakers and they sounded so good! However, I made a few changes to the recipe and they still turned out great.

                                    Whole Wheat PopTarts
                                    1 1/2 cups of whole wheat flour
                                    1 1/2 cups of whole wheat pastry flour (to make them a little lighter since I don't have fresh milled ww flour)
                                    2 tablespoons flaxmeal (for extra protein)
                                    1 teaspoon salt
                                    1 cup of yogurt (I used my crockpot yogurt)
                                    1 cup of organic palm shortening (I used Tropical Traditions, I'm loving this stuff for baking!)

                                    Jam, Jelly or Preserves of choice for filling

                                    Mix all ingredients (except for the jam) in a standmixer. I use my standmixer so it makes a nice elastic dough to roll out. If you don't have a standmixer then you can knead by hand for a couple minutes.

                                    Roll out dough on a well floured surface into a rectangle and cut into desired shape. You will need 2 pieces to make 1 poptart. Spread a teaspoon (more or less depending on the size you cut out your dough) of your jam on top of one. Then place another piece of dough on top and seal the edges with a fork.

                                    Bake on a cookie sheet for approx 18 minutes  at 350 or until lightly browned.


                                    These are wonderful warm from the oven, but you can freeze the leftovers and put them in your toaster to warm them.

                                    Here's my batch. I'm going to experiment rolling them out a little thinner next time.I'm also thinking about adding a dot of peanut butter in them :-)


                                    Photobucket

                                    MyFreeCopyright.com Registered & Protected

                                    Sunday, January 9, 2011

                                    Buckwheat Waffles Recipe


                                    I LOVE the taste of buckwheat pancakes, my mom made them often for a while when I was young. I have been making buckwheat pancakes off and on for a while using a recipe I converted that a friend gave me. If you haven't tried buckwheat, you really should! It's high in fiber, gluten free and has phytonutrients.

                                     I just got a new waffle iron and wanted some buckwheat waffles! I made some this morning and they were wonderful with organic maple syrup. If you'd rather make buckwheat pancakes, just make your batter a little thinner by adding more milk and increase your baking powder  to 2 or 3 tsp. You could make this a gluten free recipe by substituting the whole wheat flour with your favorite gluten free flour.

                                    Buckwheat Waffles

                                    3/4 cup whole wheat flour
                                    3/4 cup buckwheat flour
                                    2 TB flaxmeal 
                                    approx 3/4 cup milk (you may need more or less so gradually add this)
                                    1 TB honey
                                    2 TB melted coconut oil
                                    1 tsp baking powder
                                    1/4 tsp salt
                                    2 eggs


                                    Combine all ingredients until mixed well and bake in waffle iron. Freeze leftovers and re-heat in microwave or oven.


                                    Photobucket

                                    MyFreeCopyright.com Registered & Protected

                                    Friday, November 19, 2010

                                    Take Time to Share Your Christmas Traditions: Recipes


                                    This weeks post is 'Share Your Favorite Recipe(s)'! Yum, I'm looking forward to this one! Link up and be sure to visit some (or all) of those participating. Check back throughout the week for others who are linking up later. 
                                    ~~~~~~~~~~~~~~~~~~~~~~~~~~~~~~~~~

                                    Have you ever made homemade caramels? You are totally missing out if you haven't! I got this recipe off of Land O'Lakes a few years back and make it around Christmas. I know a lot of people shy away from candy recipes because they seem complicated or the time involved is just not worth the effort. Trust me, this recipe is worth the effort! If you love Werthers caramels you will love these because they taste just like them. This recipe makes a lot and it's perfect to divide up into several small bags and give them to friends and neighbors for cheap gifts. The recipe calls to store this in the fridge, which I do. It will make your whole fridge smell like caramels :-) The recipe has turned out perfect all the time except for the one year a neighbor came over while I was in the middle of cooking these on the stove and I let the temp get too high. They still turned out tasty, but they were too hard to eat! So, wait until the kids go to bed so you can devote your complete attention. 


                                    2 cups sugar
                                    1 cup firmly packed brown sugar
                                    1 cup milk
                                    1 cup whipping cream
                                    1 cup light corn syrup
                                    1 teaspoon vanilla


                                    Directions

                                    Butter a 13x9-inch pan; set aside. Combine all ingredients except vanilla in heavy 4-quart saucepan. Cook over medium heat, stirring occasionally, until butter is melted and mixture comes to a boil (15 to 20 minutes).


                                    Continue cooking, until candy thermometer reaches 244°F. or small amount of mixture dropped into ice water forms a firm ball (about 25 to 30 minutes).


                                    Remove from heat; stir in vanilla. Pour into prepared pan. Cool completely. Cut into 1 1/2x1-inch pieces; wrap candies in plastic food wrap. Store refrigerated.

                                    ~~~~~~~~~~~~~~~~~~~~~~~~~~~~~~~~~~~~~~~~~~~~~~~~~

                                    What's Christmas without sugar cookies to decorate! This is the perfect recipe because  it is not a sweet sugar cookie, but more of a shortbread taste which makes it perfect to decorate with frosting.Very simple recipe and bakes well every time. I picked this recipe off of a message board and pass it on to anyone who says they are going to make sugar cookies. I get great feedback from this recipe all the time.
                                    Rich Roll Cookies
                                    2.5 cups sifted all purpose flour
                                    1 teaspoon of salt (or substitute with a teaspoon of: lemon rind, cinnamon or 2 tablespoons of poppy seeds)
                                    1 cup unsalted butter (soften at room temp)
                                    2/3 cup sugar
                                    1 egg
                                    1 teaspoon of vanilla or almond extract

                                    Directions
                                    Cream together softened butter and sugar. Beat in egg and vanilla extract. Gradually add the flour and salt and blend well. Chill dough 3 to 4 hours before rolling. Preheat oven to 350. Roll out the dough and cut out into shapes. Bake 10 -15 minutes or until slightly brown.

                                    My tips: If you are in a hurry, pat out your dough into a flattened circle and cover with plastic wrap. Place in the freezer for about 30 minutes to speed up the chilling process. Then take out to roll, cut out and bake.

                                    I prefer these cookies slightly underdone to where they barely turn brown on the edges. It keeps them soft and moist. Depending on the thickness of the cookies your cooking time could be a few minutes less than the estimate above so keep an eye on these to judge about how long your batches are taking to bake.
                                    ~~~~~~~~~~~~~~~~~~~~~~~~~~~~~~~~~~~~~~~~~~~~~

                                    This is a really good casserole and perfect if you are looking for something different than the 'traditional' casseroles served during the holidays. I got this recipe from my Grandmother and it is often my dish I take to our family gatherings.  I like this casserole best really hot.

                                    Squash Casserole
                                    2 lbs yellow squash
                                    1 small white onion
                                    1 can Cream of Chicken soup
                                    1 cup sour cream
                                    1 can water chestnuts (diced)
                                    1/2 stick of butter
                                    2 cups grated mild cheddar cheese
                                    seasoned croutons

                                    Directions
                                    Slice squash and dice onion. Cook until tender and drain. In a large bowl mix in soup, sour cream, chestnuts, and squash & onion mixture. Melt butter and mix all ingredients well. Salt to taste.

                                    Line a 9x13 baking dish with croutons and cover with mixture. Add grated cheese to the top and add more croutons to the top if you wish. Bake at 350 until bubbly in the middle.

                                    ~~~~~~~~~~~~~~~~~~~~~~~~~~~~~~~~~~~~~~~~~~~~~~~~
                                    Need a good, simple and easy dip recipe? I guess this should be called more of a spread though :-) Even though it sounds gross, it is so good and it's not hot at all because the cream cheese balances it out. Trust me! This is a great recipe to take to those pitch-in holiday get togethers.

                                    Creamy Jalapeno Spread
                                    1 block of cream cheese
                                    1 small jar of hot jalapeno pepper jelly
                                    Assortment of crackers

                                    Place the block of cream cheese in the middle of a large platter and dump the whole jar of jelly on top. Fill in the rest of the platter with an assortment of crackers and serve.


                                    Photobucket
                                    MyFreeCopyright.com Registered & Protected

                                    Ok, I'm ready to read yours now!

                                    Thursday, October 7, 2010

                                    Healthy Homemade Apple Butter Recipe

                                    Ok, so last Wordless Wednesday I gave a little hint what I was up to. I've been craving apple butter and it so happened the grocery store had gala apples on sale for 90 cents a pound last week. I picked up 5 lbs and gathered up my mom's canning supplies and attempted my first ever canning experience!

                                    I wanted to make a small batch and I also wanted the apple butter to be a healthy version sweetened with honey. I came across the Pick Your Own website last year when looking for nearby organic orchards (umm, there isn't any around here!). When I was searching for an apple butter recipe I came across the site again. I believe this is the best site out there that outlines how to make/preserve different kinds of fruits, etc. Great info! Definitely bookmark it for future use. They also have lists for pumpkin patches and Christmas tree farms so this is a great resource for all families.

                                    First you have to make apple sauce before you can make apple butter! I washed, peeled and chopped 5 lbs of gala apples. IF you are using organic apples it would be a great idea to leave the peels on that way there is more fiber and it will make more apple sauce/butter. But since mine weren't organic I peeled mine.


                                    Add to a large pot with some water to cover the bottom.

                                    Cover with lid and cook on low to medium heat until tender. Approximately 25-30 mintues.


                                    Next you need to puree the apples. You can do this several different ways: blender, food processor, ricer, or hand smoothie blender. I picked up this little hand ricer on clearance so I used it. I think it works great for making apple butter. When you make apple butter you are cooking down the apple sauce to make the butter, or essentially getting rid of the extra liquid. I would take spoon fulls of the apples and the first little squeeze with the ricer would push out more liquid so I would hold it over my pot. Then as the apples begin to push through the ricer I would hold it over my crockpot.


                                    Then add the sweetener. I added 1/2 cup of honey and it was plenty! That is the great thing about using galas is because they are naturally pretty sweet.

                                    Add 1 teaspoon cinnamon and 1/2 teaspoon allspice. I don't like my apple butter very spicy. The recipe on PickYourOwn also calls for cloves, but I decided not to add that. At the end I decided on one more sprinkle of each and it was just right for me.
                                    I took the tip off the PickYourOwn to lay 2 knives over the ledge before placing the lid on top so it lets all the condensation out. Worked great!


                                    I cooked it for about 4 hours. Again, read the tips off of PickYourOwn on how to tell when it's done.

                                    I then canned the apple butter using a water bath method. I didn't take pictures because I was doing this by myself and needed both hands for everything. I ended up with 3 half pints! Each half pint is 8 oz.Wow, a lot of work for so little! Even with the apples at 90 cents a pound this still ended up being kind of an expensive project. So after doing some reading online a lot of people actually buy jarred apple sauce at the store and make apple butter from that. They claim it tastes the same. Unless you are getting your apples free, I would recommend doing this method as well. Not only for money, but time as well. Don't let this scare you into not canning, because really there are other easier ways to can AND it can also save you lots of money. I plan on having my own garden next year and the main purpose is to grow lots of tomatoes so I can make my own sauce. We eat a lot of tomato sauce and this would be a huge money saver for us.


                                    I ended up making grape jelly the next day! Yes, I was on a roll. I will post soon about this and some basic canning tips as well that will help some of you who are interested in canning, but have no experience.

                                    Photobucket

                                    Friday, October 1, 2010

                                    The BEST Mexican Food Recipes ever!


                                    The nausea has seemed to let up over the last couple of days. I'm not sure if this is for good, or it's just taking a couple days off. It has done that before, but I'm going to be hopeful that it really is going for good :-) Last night I had the worst craving for cheese enchiladas. BAD! Time and money in the bank did not permit a supper out at our favorite mexican restaurant. I have tried to make cheese enchiladas in the past but they were never good and not even close to how they are at the restaurant. I have never attempted to make my own enchilada sauce and have used canned which had left much to be desired! I really wanted the "good kind" last night so I hopped on the internet for a quick search to see what I could find. My first search pulled up the Rockin Robins Mexican Recipes. Her father had a mexican restaurant for years and these are the recipes he used in his restaurant. These are truly the BEST mexican recipes!

                                    I quickly made a list of the ingredients I needed for the cheese enchiladas and the white cheese dip. The first ingredient on the enchilada sauce recipe was 2 cups of chicken broth which I forgot to buy at the store! I usually have my own broth in the freezer from when I make crock pot chicken, but I was out. I was so upset because I didn't want to go back to the store for chicken broth and I HAD to have cheese enchiladas for supper! I checked my pantry and found a can of my husbands chicken and stars soup. I drained the juice off and added water to it to make 2 cups. Ha! But it still worked great! The sauce was pretty simple. Mine turned out a little thick. I'm not sure if I had the heat to high or it was from the chicken noodle soup broth. It was still wonderful though! The best tasting enchilada sauce I have ever tasted!

                                    I then followed her instructions for making the cheese enchiladas which is SO easy. Here is a short video below that she put together to show you how to make these. These are AWESOME! Really, I can say that these are at least as good as the cheese enchiladas I get at my favorite mexican restaurant or even better! They were so good I couldn't stop thinking about them last night ;-)

                                    After I put my cheese enchiladas into the hot oven I started on the white cheese dip recipe. Since cheese enchiladas don't take long to bake (just a few minutes!) I had to hurry with the white cheese dip recipe. I omitted a couple of things and also halved the recipe. The dip still was good, but I know if I did follow the recipe to the 'T' that it would have been great. If you are making this supper by yourself you would have enough time to make the beef or chicken enchiladas since they cook longer and this cheese dip. Otherwise I would recommend having someone working on the dip recipe while you are doing the cheese enchiladas so everything is ready at the same time. It also didn't help I was trying to make the dip so fast I popped the rubber glove on my hand when I was chopping the jalapeno pepper and juice went in my eye!

                                    I just wanted to share my findings to my readers in case you have been looking for restaurant quality mexican food recipes. Be sure to check out the entire Rockin Robin website because there are lots of mexican recipes! Enjoy!


                                    Photobucket

                                    I was not compensated for this post. I'm simply sharing great recipes I found to my readers for them to enjoy as well!

                                    Thursday, September 9, 2010

                                    Favorite Natural Cleaning Product Recipes?

                                    Asking for help ladies :-) I need to find a  good natural cleaning product recipe for my glass shower! I have been experimenting with baking soda, vinegar, tea tree oil and Dr. Bronner's Hemp Almond Pure Castile Soap. However, it's still not cutting the soap scum completely in my glass shower and leaves a film no matter how much water I use to rinse it off. It also leaves bad water spots! Maybe I'm using the right products, but not just the right ratios? I'm just kind of dumping in what I think in a dish each time I clean and use it. I wanted to check with you all to see if you had a favorite recipe that works well for a glass shower or if you have any other recipes or links you'd like to share. Once I find the one that works for me I will be sure to share it with you!

                                    I do have one favorite natural cleaning recipe I love using and it's so simple!
                                    Glass Cleaner: Fill a spray bottle with half water and half white vinegar. Add several drops of tea tree oil and shake well. The tea tree oil totally takes out the vinegar smell and leaves a yummy scent (not strong like tea tree oil at all!). Tea tree oil is also a disinfectant. I have been using this recipe for a while now and love it. Cleans glass great with no streaks!

                                    Nothing smells better than using natural cleaning products :-)

                                    Thanks for your help ladies!

                                    Photobucket

                                    Friday, July 16, 2010

                                    Make your own healthy ice cream

                                    I've been craving ice cream lately! I don't know if it's because I had a lot of it on our vacation (the unhealthy kind!), writing my review on Coconut Bliss or just because it's summer, but I've got to have some more!

                                    I was on a mission to make a healthier alternative with a natural sweetener and lower in fat, but still taste good! I spent some time online looking up various recipes. I never found one that was what I was looking for, so once again I created my own recipe. I'm amazed the first time I made it, it was good!


                                    Vanilla Almond Milk Ice Cream

                                    Ingredients
                                    • 3 1/2 cups of vanilla flavored almond milk (heated slightly in the microwave)
                                    • 5 egg yolks
                                    • 1 teaspoon vanilla extract
                                    • 1/2 cup maple syrup
                                    As I mentioned before I love Pacific Natural Foods Organic Almond Milk! If you look on the nutrition label of most almond, soy, rice milks you are going to find it is sweetened with evaporated cane juice which is the same thing as sugar (IMO). Pacific Natural Foods makes a really sweet one that does not have an added sweetener. Go to their website for coupons on their almond milk and other products! Also by making this ice cream with the almond milk it is so much cheaper! Have you seen the price of heavy cream lately??

                                    You can see I'm still working on that huge bottle of Mexican Vanilla Extract I bought in the Caribbean in January! The eggs are free range, anti-biotic free from my in laws. It's nice to get fresh eggs :-) A side note, save your egg whites from this recipe! Put them in a bowl and then after you make the ice cream mixture go ahead and scrabble them. You can keep them in the fridge until breakfast.

                                    Directions
                                    1. Using a stand mixer (or use a hand one if it's all you have) beat the egg yolks until light and fluffy.
                                    2. Gradually add your warm almond milk while you are still mixing your egg yolks. Keep mixing for another minute after you add the rest of the almond milk.
                                    3. After mixing pour into a sauce pan and cook over medium high heat, constantly whisking the mixture.
                                    4. Cook mixture until it reaches to a boil. If your mixture looks like it is separating lower the temp slightly and whisk a little faster. 
                                    5. Mixture will look slightly thickened (mine did not, but after it reached to a boil it was good for me!)
                                    6. Whisk in your vanilla extract and maple syrup.
                                    7. Pour into a glass bowl and cover with a piece of wax paper on top. Let it cool to room temp, then place in fridge for a few hours or overnight.
                                    8. Pour mixture into your ice cream machine and process according to the manufacturer's instructions. 
                                     I have this 1 1/2 qt Cuisinart Frozen Yogurt and Ice Cream Maker and this recipe works great in it! I have to admit I only let my mixture chill in the fridge for 3.5 hours because I wanted some ice cream so bad ;-) It still turned out great! This ice cream is not as creamy as Haagen Daz because obviously it's much lower in fat content, but it's just as good! Freeze the leftovers (if you have any hehe!) in a freezer safe plastic container. This ice cream freezes pretty hard (as I have experienced with all homemade ice creams, even the ones with all heavy cream) so you'll need to let it sit out on the counter for a few minutes to thaw.


                                    Next time I want to try blending in some sweet strawberries or perhaps some chocolate & nuts. Yum!

                                    Photobucket

                                    MyFreeCopyright.com Registered & Protected

                                    Sunday, June 27, 2010

                                    Healthy Chocolate Chip Granola Bar Recipe

                                    OK, so maybe it's not so healthy because it does have chocolate chips in it ;-) However, I think I've come up with a pretty good basic recipe that you can substitute the chocolate chips for something else such as dried fruit.

                                    My recipe is SO much healthier than any granola bar you can purchase at the store. Here's an ingredient list from a popular brand of chocolate chip chewy granola bars. What do you see? Lots of yucky stuff! They are filled with preservatives and hydrogenated oils! Don't you love the "Adds a dietary insignificant amount of trans fat". All I want to say about that is look who allows them to say this AND this same group of people also allow our public school food to be the same crap!


                                    Then they put this info on there as well. I'm sure this is on the front of the box at the store. Trying to promote how their bar is healthy since there is no high fructose corn syrup, but really it STILL contains CORN SYRUP which IMO is the same thing!

                                    So, back to my recipe! I looked at several recipes and had one failed batch of granola bars. Really it failed because I baked them too long and burned the bottom. So I revamped the recipe and tried again :-)I really like this recipe and the bars do not fall apart which I have problems with my no-bake granola bars as they come to room temp.

                                    Ingredients:
                                    2 cups of rolled oats (I buy mine from the bulk food section at Whole Foods)
                                    1/2 cup whole wheat flour
                                    1/2 cup nuts (I used half pecans and walnuts)
                                    1/2 cup chocolate chips
                                    1 egg
                                    1/2 cup honey
                                    1/4 cup coconut oil (melted for a few seconds in the microwave)
                                    1 teaspoon vanilla extract (I'm working on using up this huge bottle I got in the Caribbean this past January!)


                                    Preheat your oven to 350 degrees


                                    Can't forget the picture of the chocolate chips! These are made with sugar, but there are other alternatives available at Whole Foods such as vegan, dairy free, sweetened with evaporated cain juice, carob chips, etc.

                                    Add all your dry ingredients to your bowl and mix well.

                                    Then add your liquid ingredients.
                                    Coconut oil.

                                    Mmm, honey!

                                    Add the egg.


                                    Mix well. 


                                    Dump into a foil lined 9x13 glass baking dish.

                                    Evenly spread out mixture.
                                    Press firmly into pan.

                                    Bake 20 to 25 minutes until golden brown. 


                                    Lift the foil out while still hot and cut into squares with pizza cutter. 

                                    Then enjoy! I keep these in an air-tight container in the fridge since it has an egg in it. I actually like them cold, I think they have more flavor that way.


                                    Photobucket

                                    LinkWithin

                                    Related Posts with Thumbnails